


EVERYTHING you need to set up a Fabulously Successful Potato Bar
Fool-proof Potato Bar for a large crowd
Many years ago when I was first assigned to coordinate a potato bar, I thought ‘this is a no-brainer piece of cake.’ Yes, well not so much. I realized I had far more questions than answers. For example: how many potatoes come in a large bag of potatoes? (it depends, see below) How many potatoes can I fit into my 30 inch oven? (34-38 (16 ounce) potatoes on 2 racks and up to 50 (8-10 ounce) potatoes on 2 racks) How long does it take to cook 50 potatoes in an oven? (1 hour and 15-30 minutes) Should I wrap the potatoes in foil prior to cooking? (no, see below for why) Exactly how much sour cream should I buy to go with them? (2 tablespoons per person). And finally, what’s the most important step many people forget until they are ready to serve the potatoes? (cutting them open when prepping them once baked.)
It took me several potato bars to figure all this out. Allow me to share my hard-won knowledge with you.
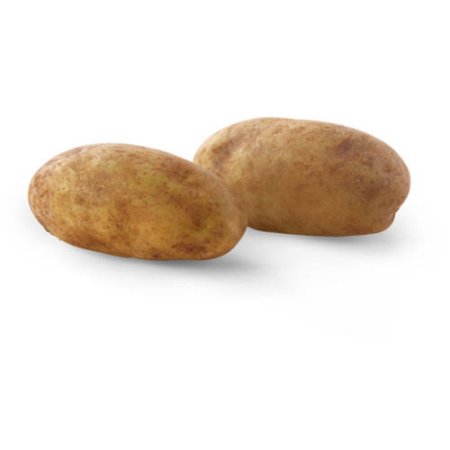
What kind of Potatoes should I use on my Potato Bar?
Russets. End of discussion. : )
How many Potatoes do I need for my Potato Bar? (And what size??)
‘How many potatoes do I need?’ should be a pretty easy question to answer, right? Well yes, if you were ordering potatoes by count. Not so much when you have to purchase them by weight. It’s an even bigger issue if you’re serving several hundred. No worries. Let’s start with the basics.
The absolute smallest size potatoes you would want are 5-6 ounces. I would only use potatoes this small if I was serving multiple other items and the potatoes were just ONE of the choices. You need to be careful – because unless the potatoes are specified as “Jumbo”, these 5-6 ounce potatoes are probably the exact size you’re going to get if you buy a 10 pound bag of potatoes. Here’s what a 10 pound bag of 5-6 ounce potatoes looks like.

This 10 pound bag of potatoes from Sam’s Club holds 28 medium size (5-6 ounce) potatoes. (PS: They are also not russets. They are Yukon Golds – which you do not want for a potato bar). See how small some of them are?
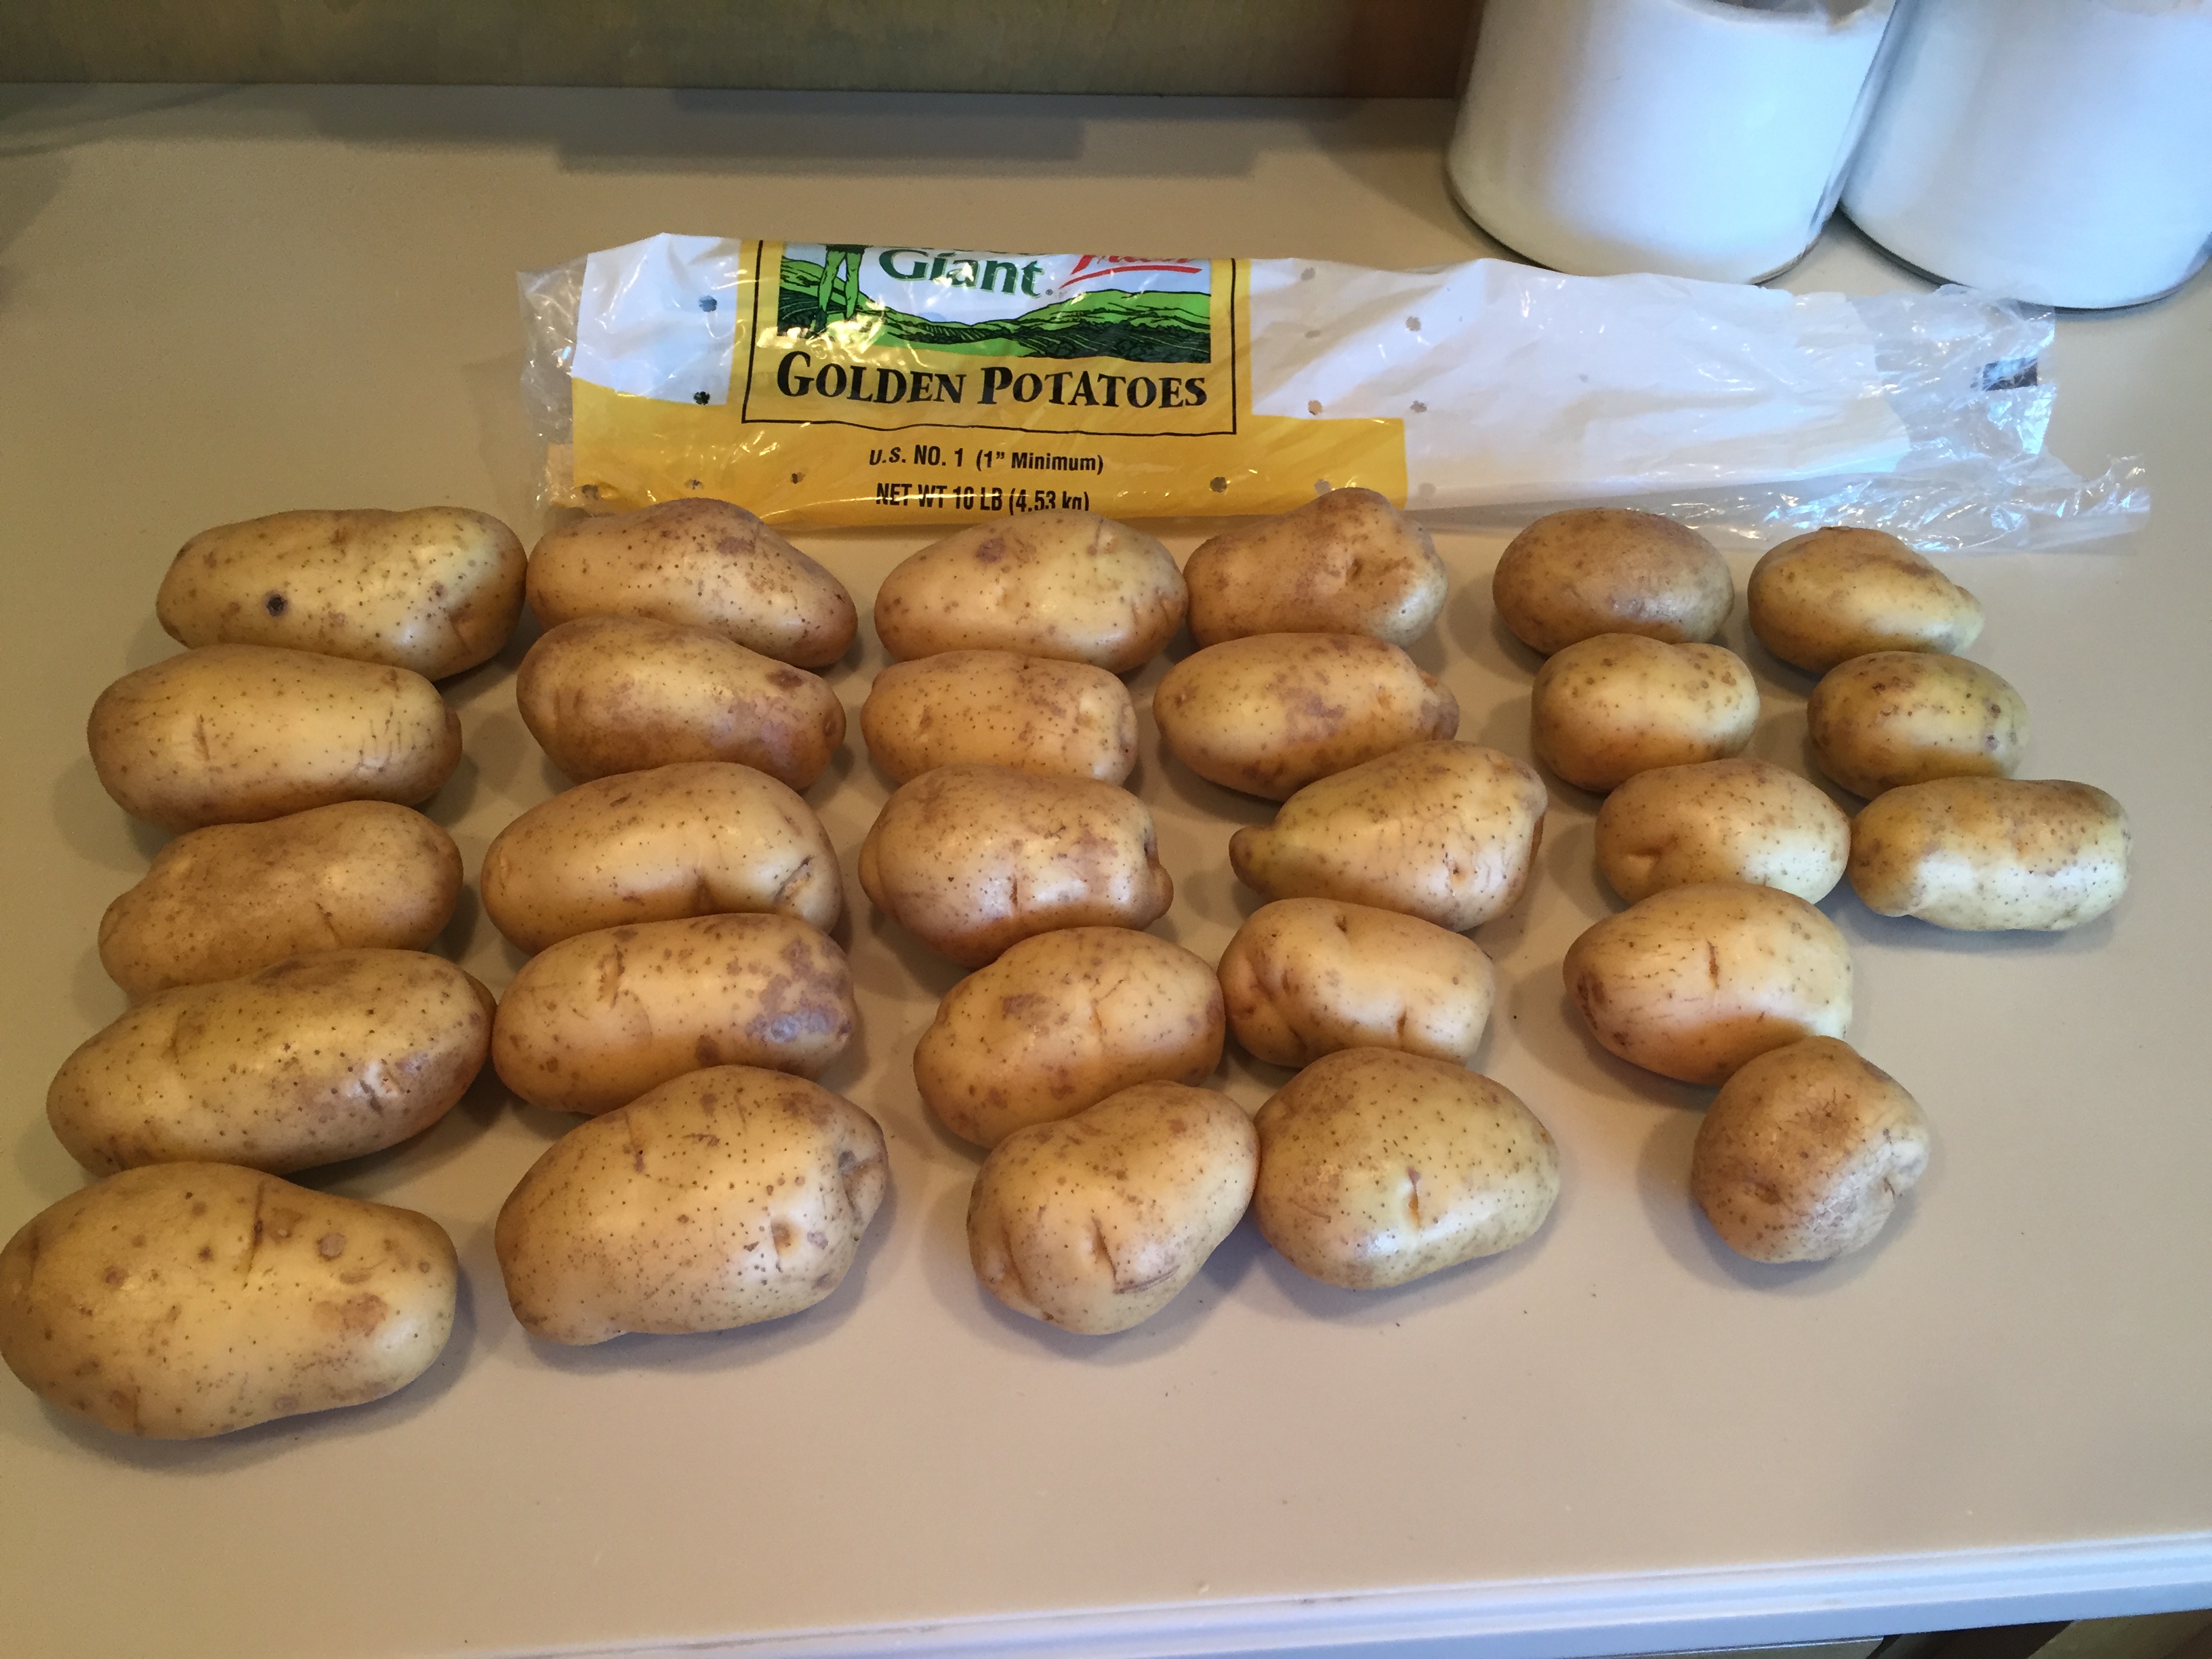
You want 10 – 14 ounce (jumbo) russet potatoes
If the Baked Potato Bar is the main thing you’re serving, then you really want a 10 – 14 ounce potato. These are often sold as “Jumbo” potatoes and there are generally 15 – 17 Jumbo potatoes in a 10 pound bag. The smallest I would go is an 8 ounce potato if I was also serving a salad.
Another option is to order 50 pound boxes of potatoes. These 50 pound boxes are often specified by “count”. You’ll want a 70-count or 80-count box, which will yield you approximately 70 potatoes in the 70-count box or 80 in the 80-count box. These potatoes will be 8 to 12 ounces in size, averaging 10 ounces. If in doubt, call the merchant and ask them the count per 50 pound box. Here’s a great page from the Idaho Potato Commission which shows you potato sizes.
How many potatoes do I need to serve a Potato Bar for 100?
If you’re planning a potato bar for 100, with potatoes as the main thing you’re serving, you can safely order 7 (10 pound) bags of JUMBO potatoes from Sam’s or COSTCO. You’ll end up with approximately 115 potatoes. These potatoes are 10 – 14 ounces in size and should be just what you want. NOTE: When buying 100 potatoes, assume 2-3 are going to have to be discarded due to condition.
In summary:
A 10 pound bag of Jumbo Russet Baking Potatoes = about 15 – 17 potatoes.
A 10 pound bag of Regular Russet Potatoes = about 26 – 28 potatoes.
A 50 pound box of Russet Baking Potatoes = about 70 – 100 potatoes depending on size. That’s a large variance, so contact the merchant and ask what size potatoes you’re buying and the average count of the box.

Welcome to Aloha Dreams!
I'm so glad you dropped by. I'm Betsy. Here you'll find my favorite fabulous, trusted recipes - everything from delicious, quick meals for your family to wonderful classics made easy.
I'm also here to help you with large group recipes from 20 to 200. So next opportunity you get to cook for a large group - Say 'Yes!' Then relax. I've got your back.
Ever wished you could build your dream home? How about building your dream home in a tropical paradise? Join me, room by room, as we design and build a fabulous dream home in Hawaii!
How do I bake a large amount of baked potatoes?
You have 3 options.
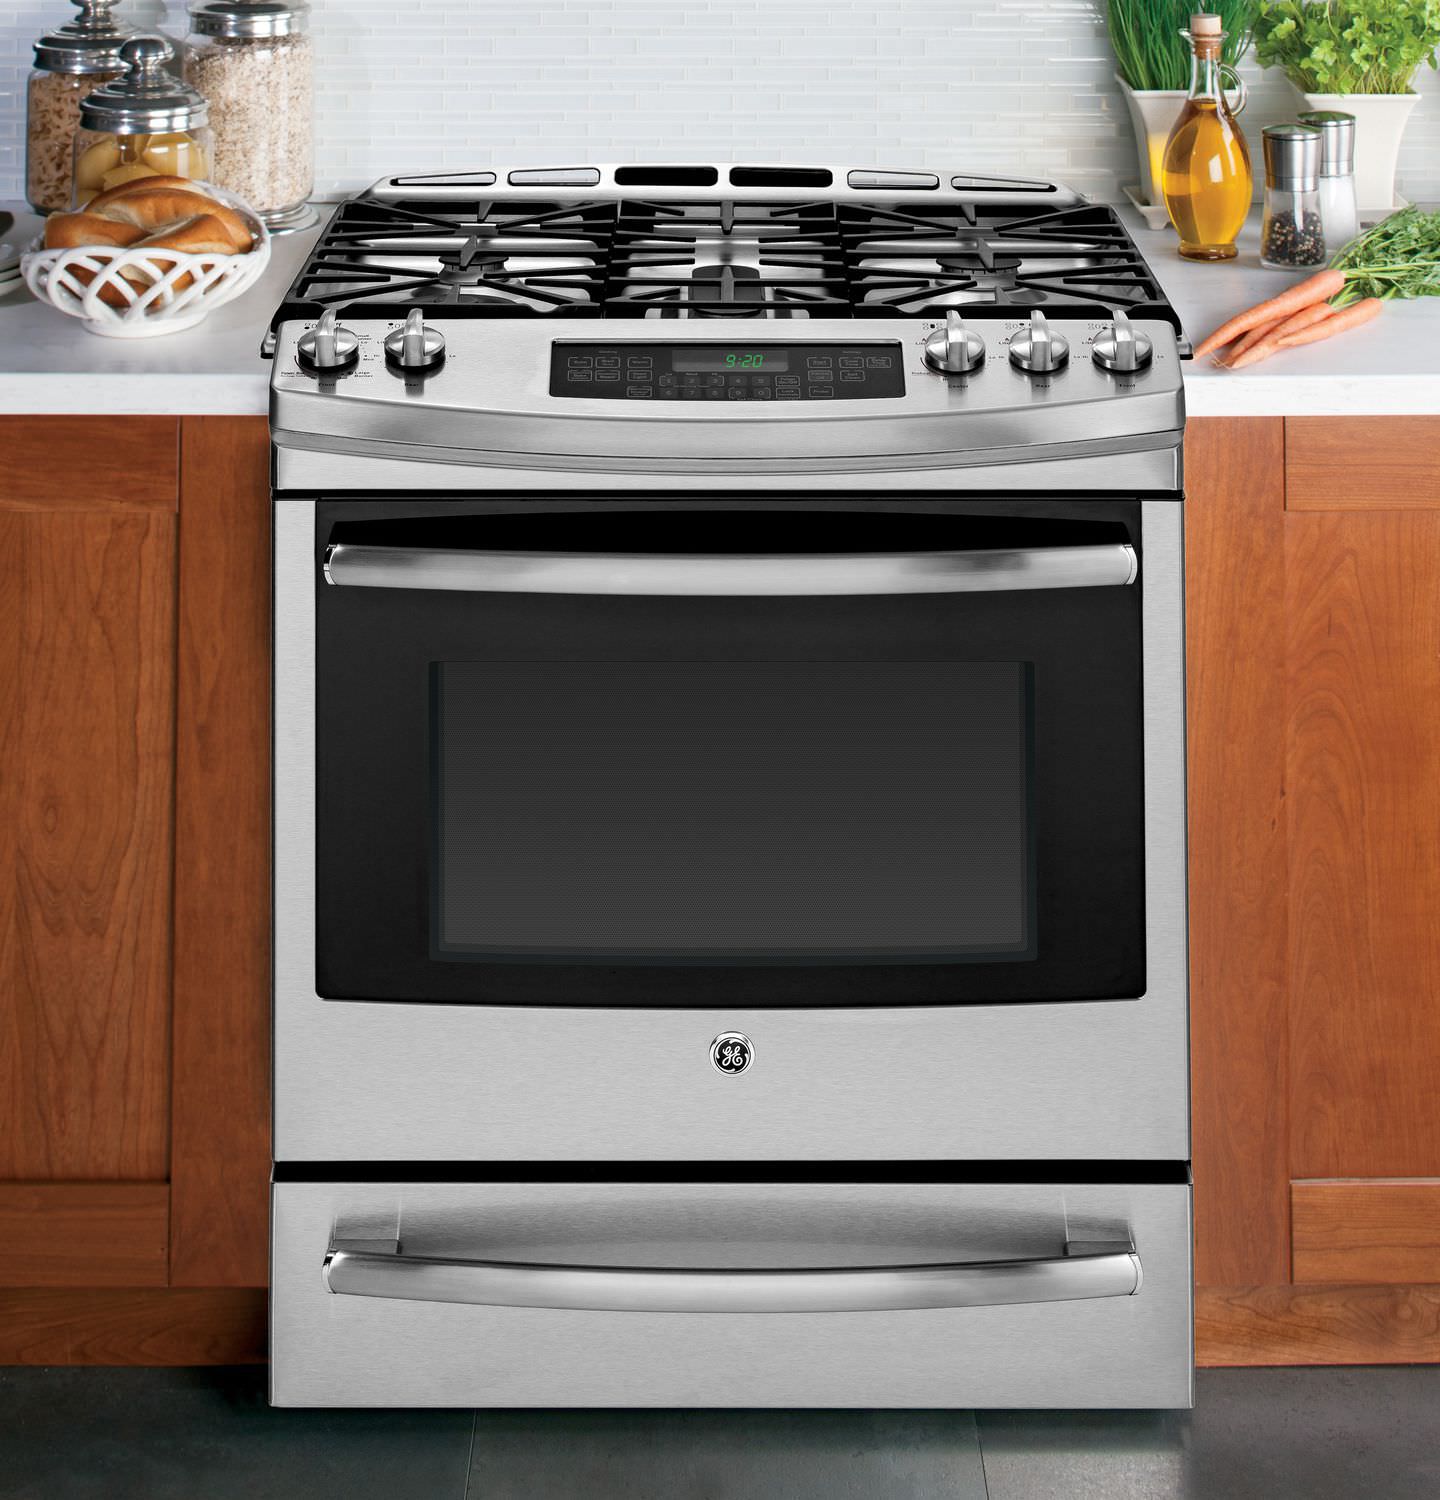
Method #1 Regular (30 inch) Oven
How many potatoes can you cook at one time in a regular oven?
A regular (30 inch) oven will hold up to 24 – 25 average size potatoes per shelf (3 rows of 8 each) x 2 shelves for a total of 48 – 50 potatoes per oven. NOTE: If you’re cooking 16 ounce potatoes, plan on 17-19 potatoes per rack or 34-38 potatoes per oven. When I’m cooking for large groups of youth (several hundred), I use the average size potatoes and divide the number I’m serving by 50. Thus if we’re doing a potato bar for 200 youth, I make arrangements for the potatoes to be cooked in 4 ovens.
How long does it take to cook 50 baked potatoes in a regular oven?
My oven, which runs true to temperature, will cook 50 (8-10 ounce) potatoes at 400 degrees F in 1 hour and 30 minutes to be sure they are all completely done. When tested at 1 hour and 15 minutes, they were pretty close to done, but I give them an extra 15 minutes to be safe. If you’re pressed for time you can probably get away with 1 hour and 15 minutes, otherwise plan on 1 hour 30 minutes.
Method #2 Convection Oven
How many potatoes can you cook at one time in a convection oven?
Assuming it’s a 30 inch convection oven with 2 racks, it hold the same amount as the regular oven .
How long does it take to cook this many baked potatoes in the convection oven?
You can cook 48 regular size potatoes at 375 degrees F in between 50 minutes to 1 hour and 10 minutes to be safe.
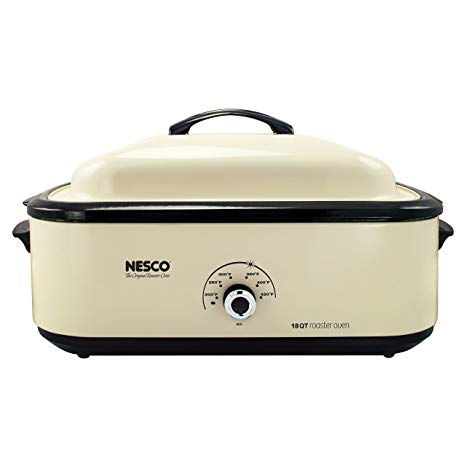
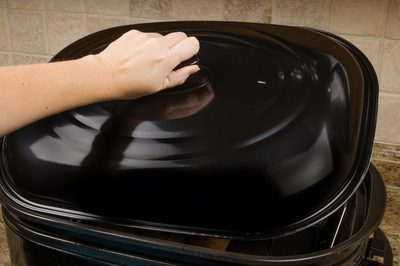
Method #3 Roaster Oven
Can you make baked potatoes in an electric roaster?
Absolutely!
How many baked potatoes fit in a roaster oven?
An 18 quart roaster oven will hold 16 – 20 (14-16 ounce) potatoes. Or, an 18 quart roaster oven will hold 1 (10 pound) bag of No. 1 potatoes (28-30 potatoes in the bag).
How long does it take to cook baked potatoes in a Roaster Oven?
It takes about 1 hour and 45 minutes at 400 degrees F.
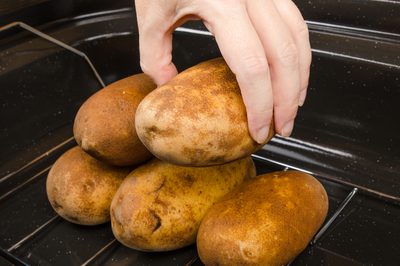
How do I Bake a Lot of Potatoes in an Oven?
Step 1 – Prep the Potatoes
Step 2 – Load the Potatoes into the Oven(s)
Step 3 – Bake the Potatoes
Step 4 – Remove and Wrap the Potatoes


How do I Bake Potatoes in a Roaster Oven?
Step 1 – Prep the Potatoes
Step 2 – Pre-heat the Roaster
Step 3 – Load the Potatoes and Cook
Step 4 – Remove and Wrap the Potatoes
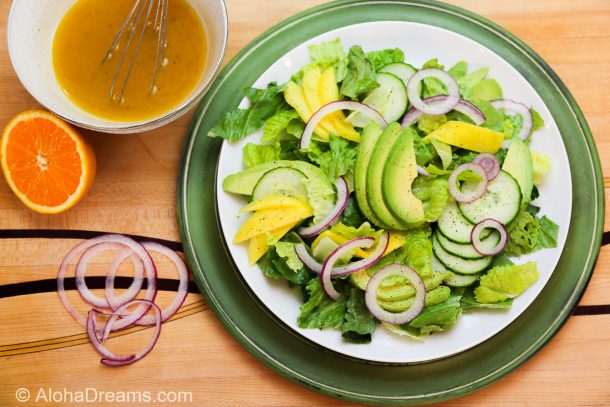
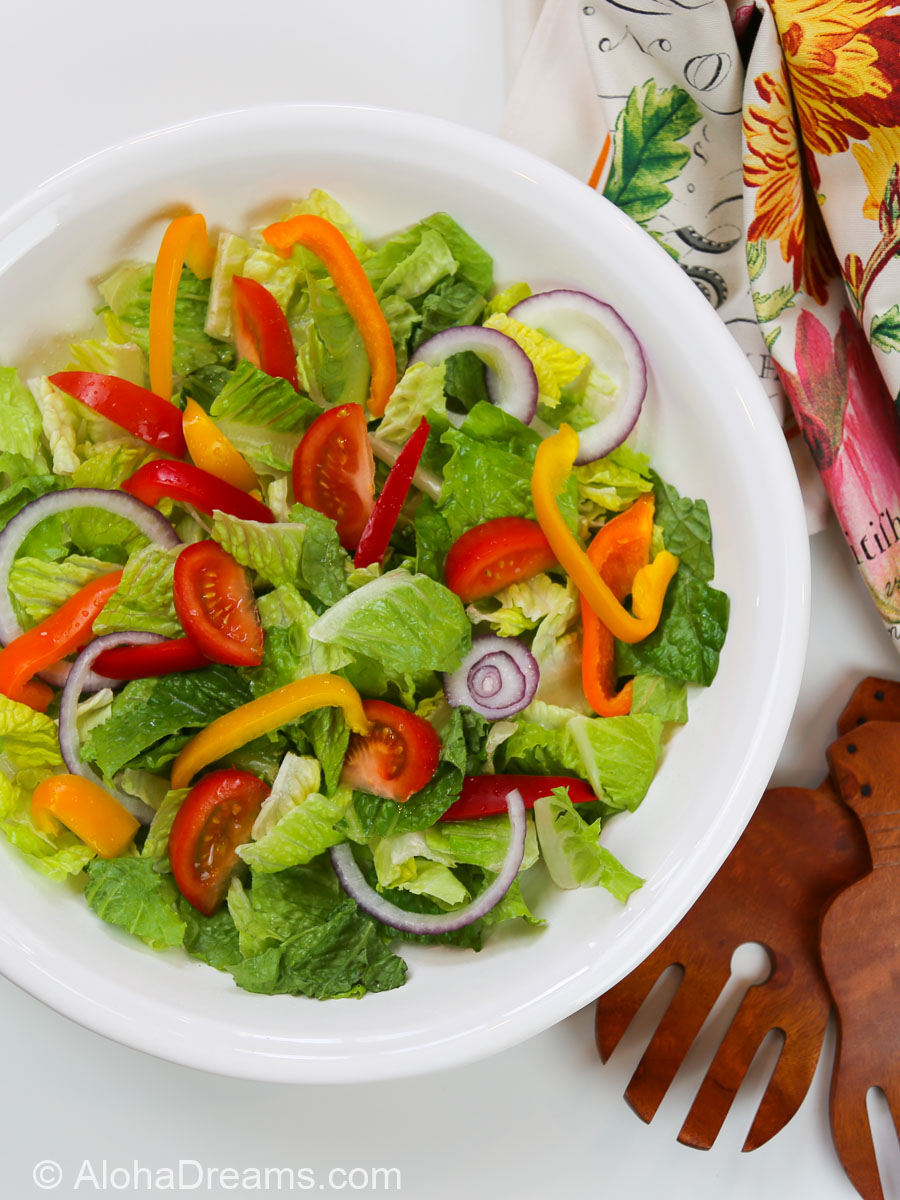
Here’s how to serve a Great Salad for A Large Group
How do I Bake Potatoes in a Campfire?
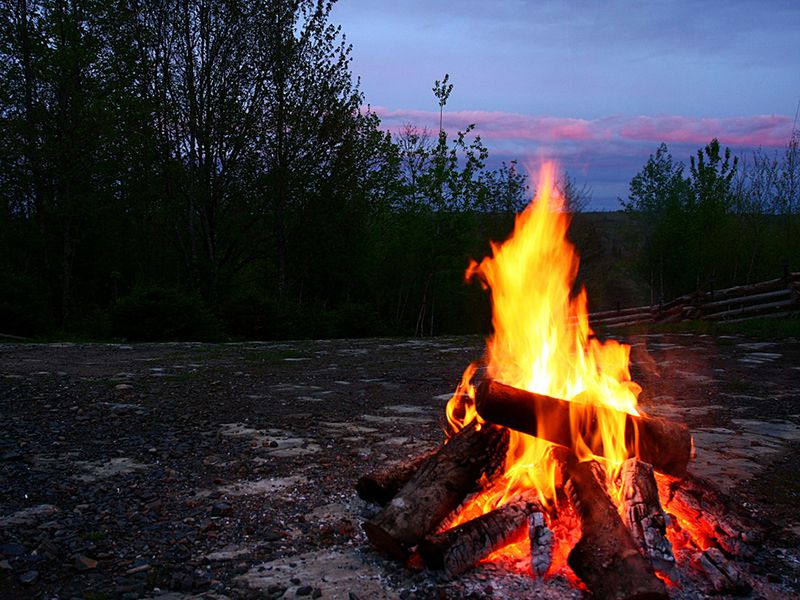
There are some secrets to cooking a great baked potato on the campfire. If you’re not careful you can end up with burnt and or uncooked potatoes. Here’s how to avoid those pitfalls and consistently turn out great potatoes every time.
Step 1 – Build a Fire to create perfect coals to bake your potatoes
You’ll want to start the fire at least 60 or even 90 minutes before you want to start cooking. Your potatoes will take up to 1 hour and 15 minutes to cook, so I would recommend you start your fire 2 hours and 45 minutes – 3 hours before you intend to eat. The potatoes will hold well if you get done early but this will ensure you’re at least done in time!
Keep adding wood so that you have a hot fire. It doesn’t have to be big – just hot. You don’t need a roaring inferno. A small, well-tended fire will create good hot coals – and use less wood. Let the fire burn, leaving it alone (this is a good time to do your prep.) and in about an hour you should have plenty of hot coals. Using tongs and/or campfire gloves, move the coals to one side of the fire or fire ring, spreading them out to an even layer, large enough to accommodate your potatoes. This is where you’ll be doing your cooking.
Step 2 – Gather your Supplies
Here’s what you’ll need:
- 10 – 14 ounce potatoes (at least one per person)
- aluminum foil
- butter
- salt
- tools
- a small spade with a long handle
- a set of tongs
- a pair of old oven mitts – or – even better – a campfire glove
Using these tools allows you to cook over a campfire without worrying about getting burned.
Step 3 – Prep the Potatoes
Step 4 – Stoke the Fire
Add more wood to the other side of the fire ring. This will ensure a supply of new coals. Keep tending the flames and moving the new coals as needed to replenish your coal bed. Once your coals are ready, you can begin cooking.
Step 5 – Put the Potatoes in the Hot Coals
The first secret is not to put the potato directly into the fire. Now that the flames have died down and you have moved the red glowing coals off to the side, this is where we will put our potatoes.
You’ll want to be careful! Those coals are hot! Use the spade or tongs to place the potatoes on top of the coals.
Now just be patient. The reason you’re putting the potatoes in the coals and not the flames is so you don’t get burnt potatoes. But cooking in the coals will take a bit longer. It should take your potatoes about 1 hour to cook in the hot coals.
While the potatoes are cooking, you might want to keep the fire going on the other side to supply yourself with fresh coals – especially if you are cooking for a crowd.
Step 6
Baked potatoes take a while to cook in a campfire. Expect them to take at least 45 minutes and more like 60 – 75 minutes depending on your coal configuration. Give them a turn every now and then or reposition them in the embers. A good pair of BBQ tongs works well here as well as a pair of hot gloves (Hot Gloves on Amazon). To test if the potato is cooked, don’t unwrap the foil (as you could get ash over the potato). Instead, with Hot Glove on, push your finger into the side of the wrapped potato. If the potato feels soft and your finger leaves a dent, then the potato is probably cooked.
Try these other Fabulous Recipes for your next Large Group Cookout!

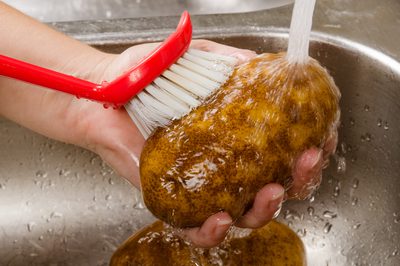
What’s the Best Way to Prep Potatoes for Baking?
(Answer: Do it the NIGHT BEFORE)
Step 1
Scrub all dirt and any eyes from the potatoes with a vegetable brush under cold running water. Rinse potatoes thoroughly and use a paring knife to remove any black spots or eyes.
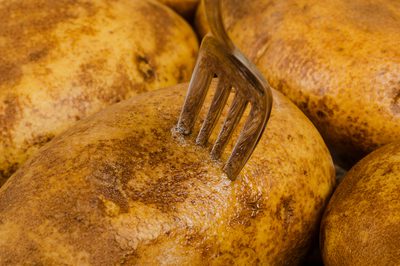
Step 2
Use the paring knife to poke several holes in each potato to prevent them from bursting as they cook.
Step 3
Step 4
How do I know if my Baked Potatoes are done?
The best way is to pick a few at random and take their temperature. The center of a perfectly done baked potato should be 205 degrees. At that temperature your potato will have the perfect fluffy interior. Just use an instant-read thermometer to take its temperature. It may sound fussy, but it’s the only way to guarantee that you’re getting uniformly done potatoes.
How do I Keep Baked Potatoes Warm?
Holding a FEW Baked Potatoes
For regular meals or small groups, it’s best to plan to serve your potatoes within 15 minutes from the time it is finished baking. However, if you need to hold your potato for longer than 15 minutes:
- for small groups at home, the best method for holding a baked potato is in a warming drawer if you have one available. If not, wrap the potatoes in foil, roll the potatoes slightly with the palm of your hand and put them in a cooler. Do not plan to hold the potatoes in a low oven because the dry heat is going to take a lot of the moisture out of them.
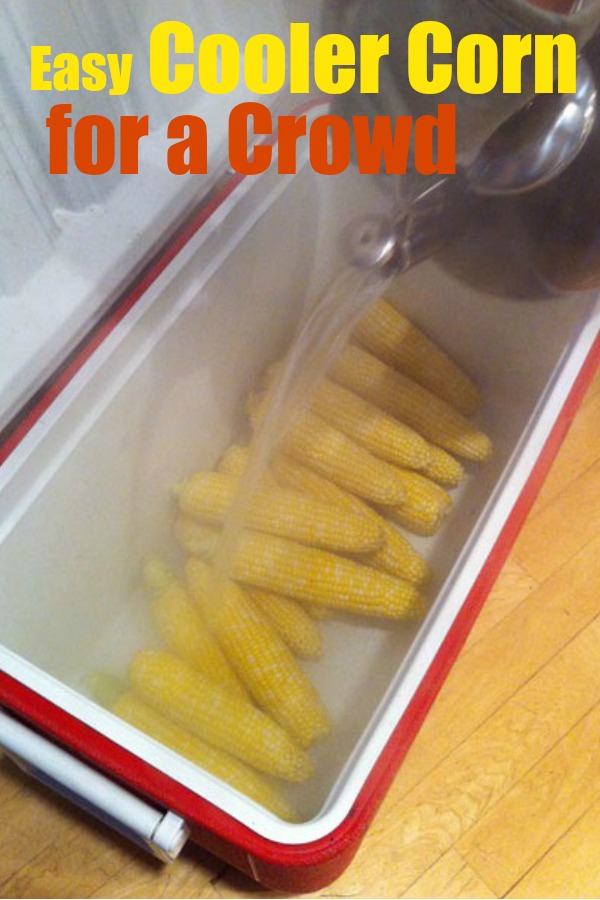
Holding MANY Baked Potatoes for up to 2 hours
- When the potatoes are 45 minutes from being done, bring several large covered pots of water to a boil. Place a large cooler outside and when water is boiling, pour it in the cooler(s) and quickly close the lid. Once the potatoes are a few minutes from being done, drain off the water and quickly re-close the lid. Once the potatoes are done, use an oven mitt to grab the potatoes and place each in a square of foil and then wrap to seal in the heat of the oven. After prepping the potatoes per the instructions above, add the wrapped hot potatoes to the cooler and quickly close the lid. It helps to have several volunteers prepping the potatoes to speed this up as much as possible. The potatoes will stay warm for up to 2 hours. Do not plan to hold the potatoes more than 2 hours after baking, the skins wrinkle and the quality degrades. You could also use an old clean blanket and cover up all the foil wrapped potatoes inside the cooler to gain a little more time, but I wouldn’t plan on any longer than 2 hours and 30 minutes tops.
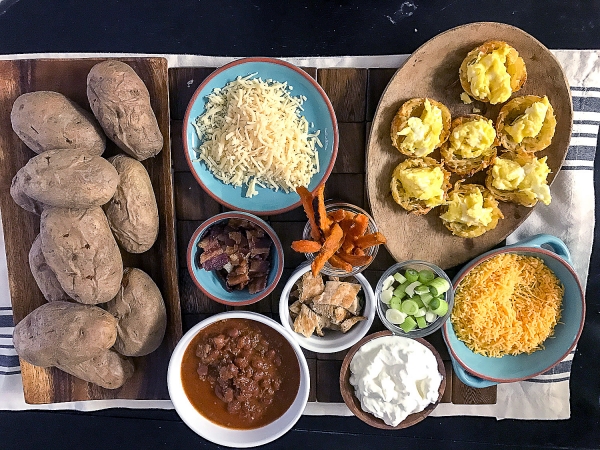
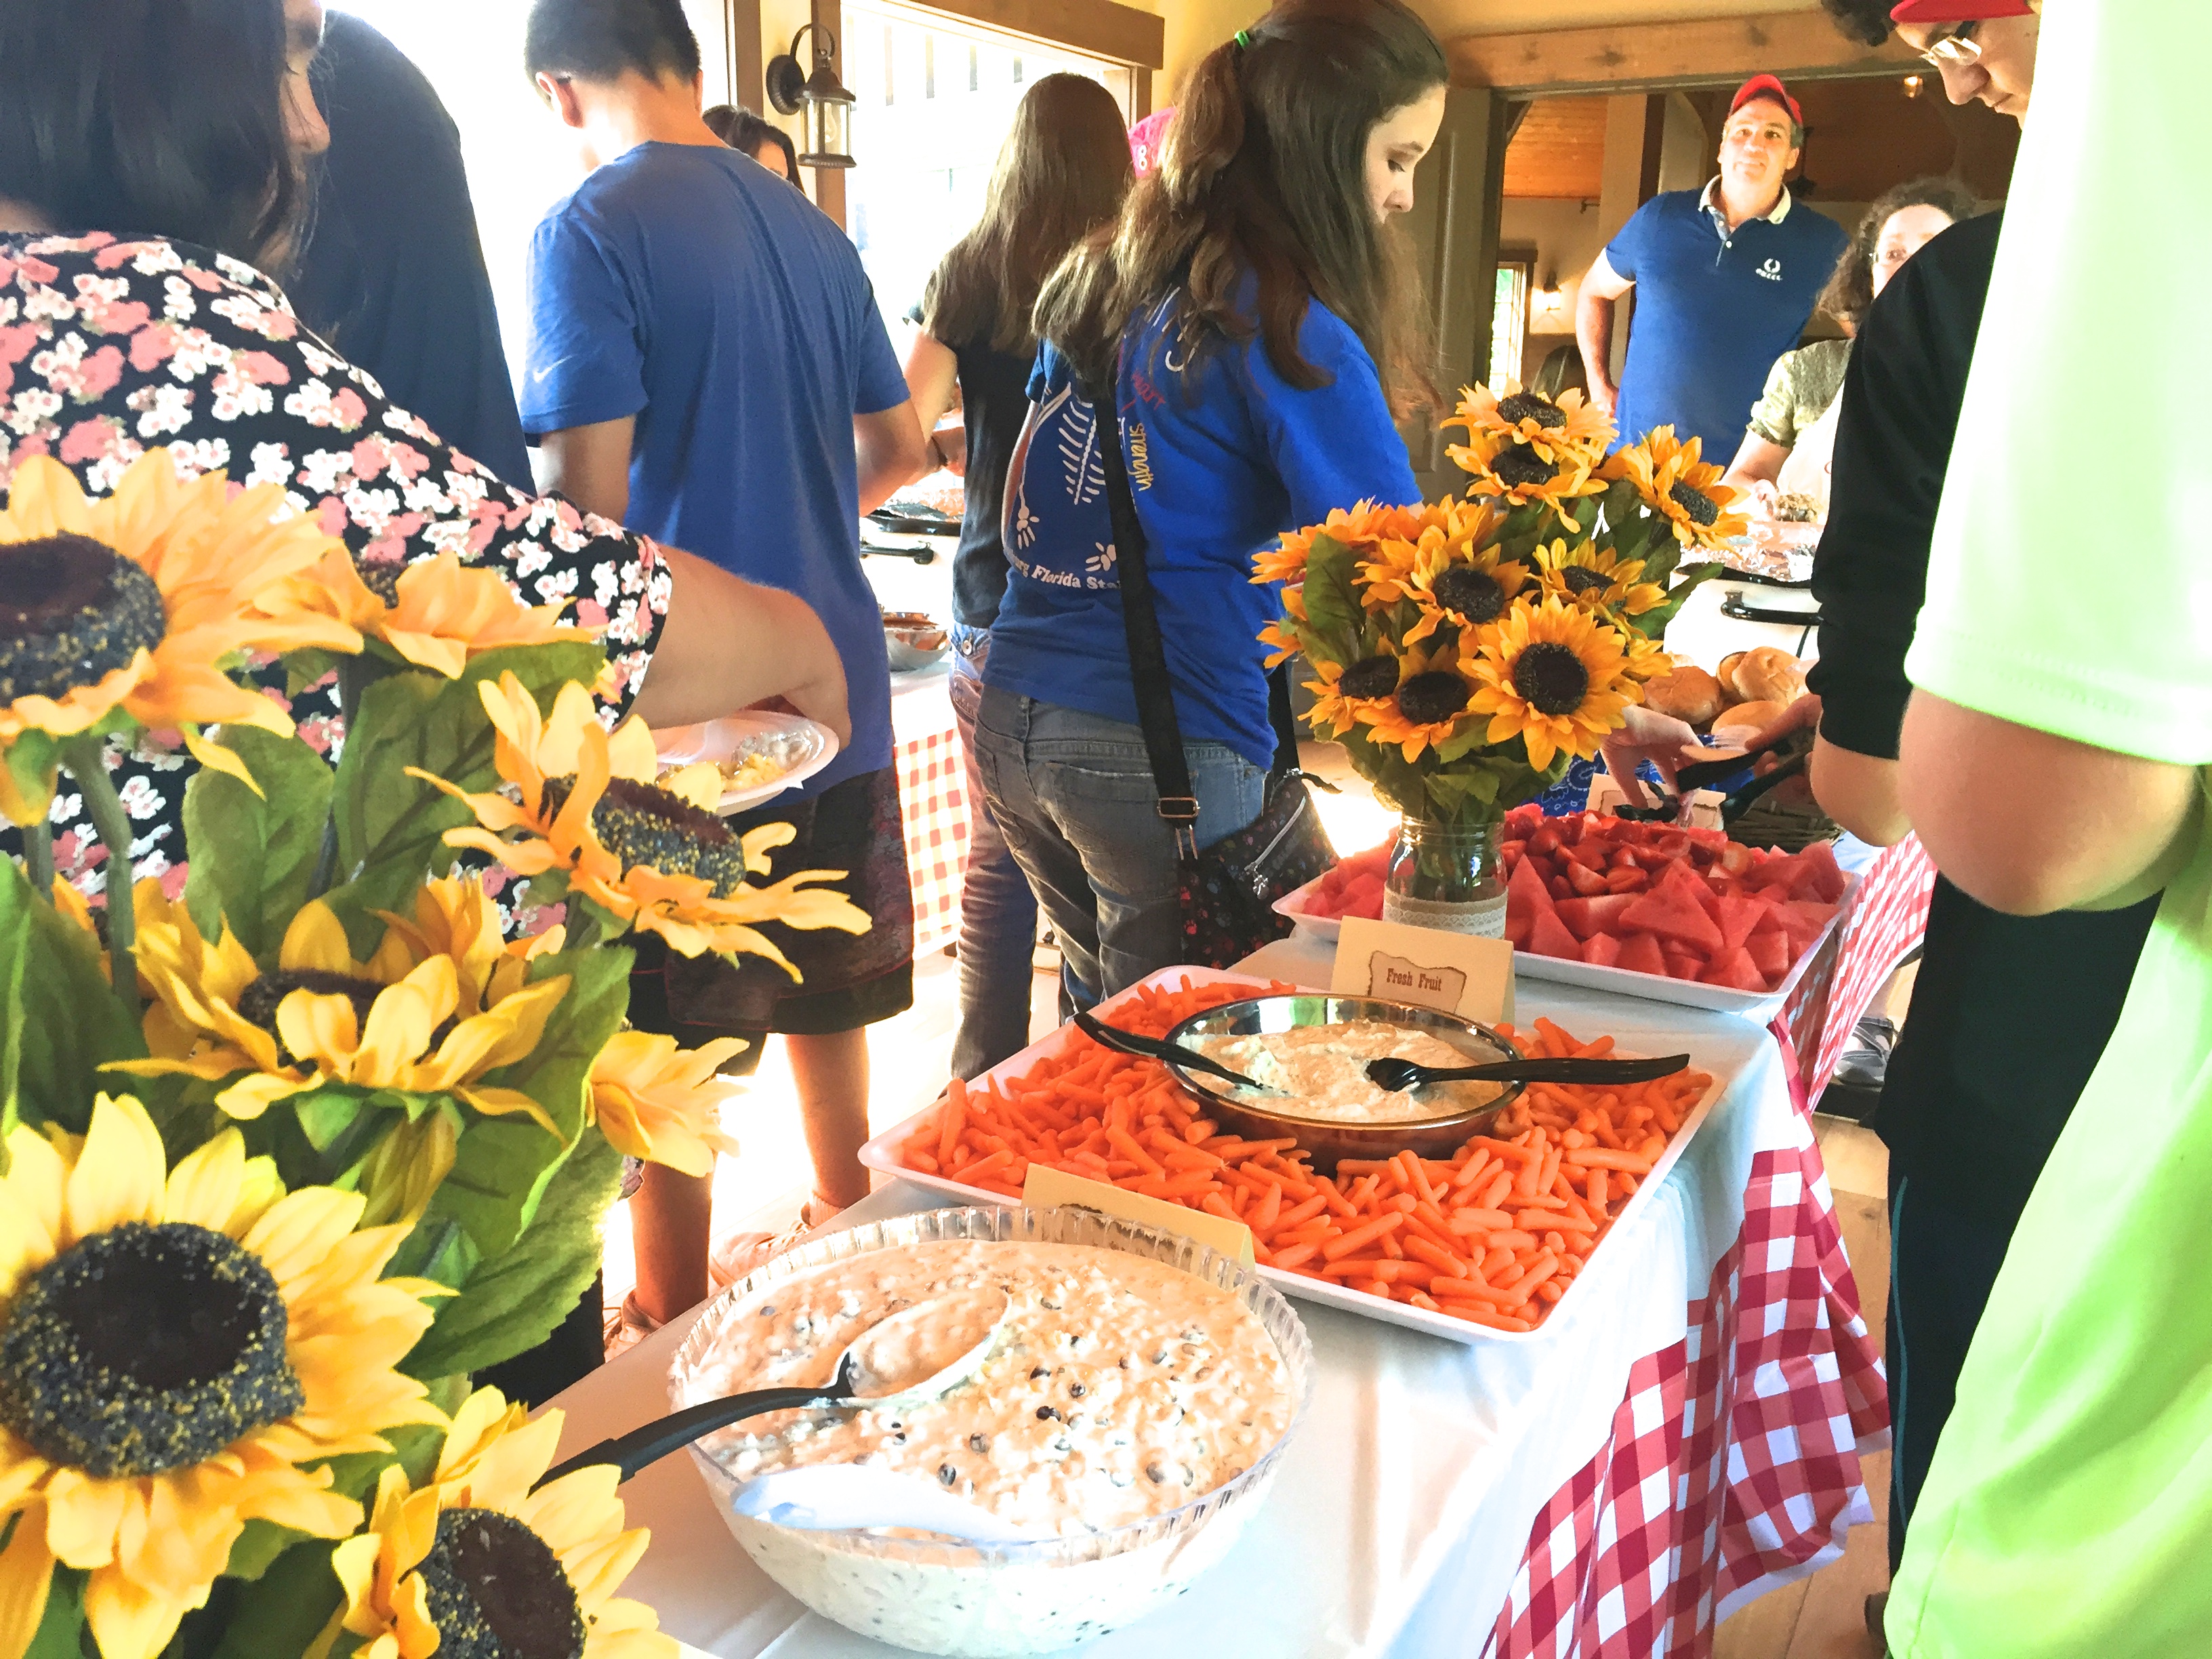
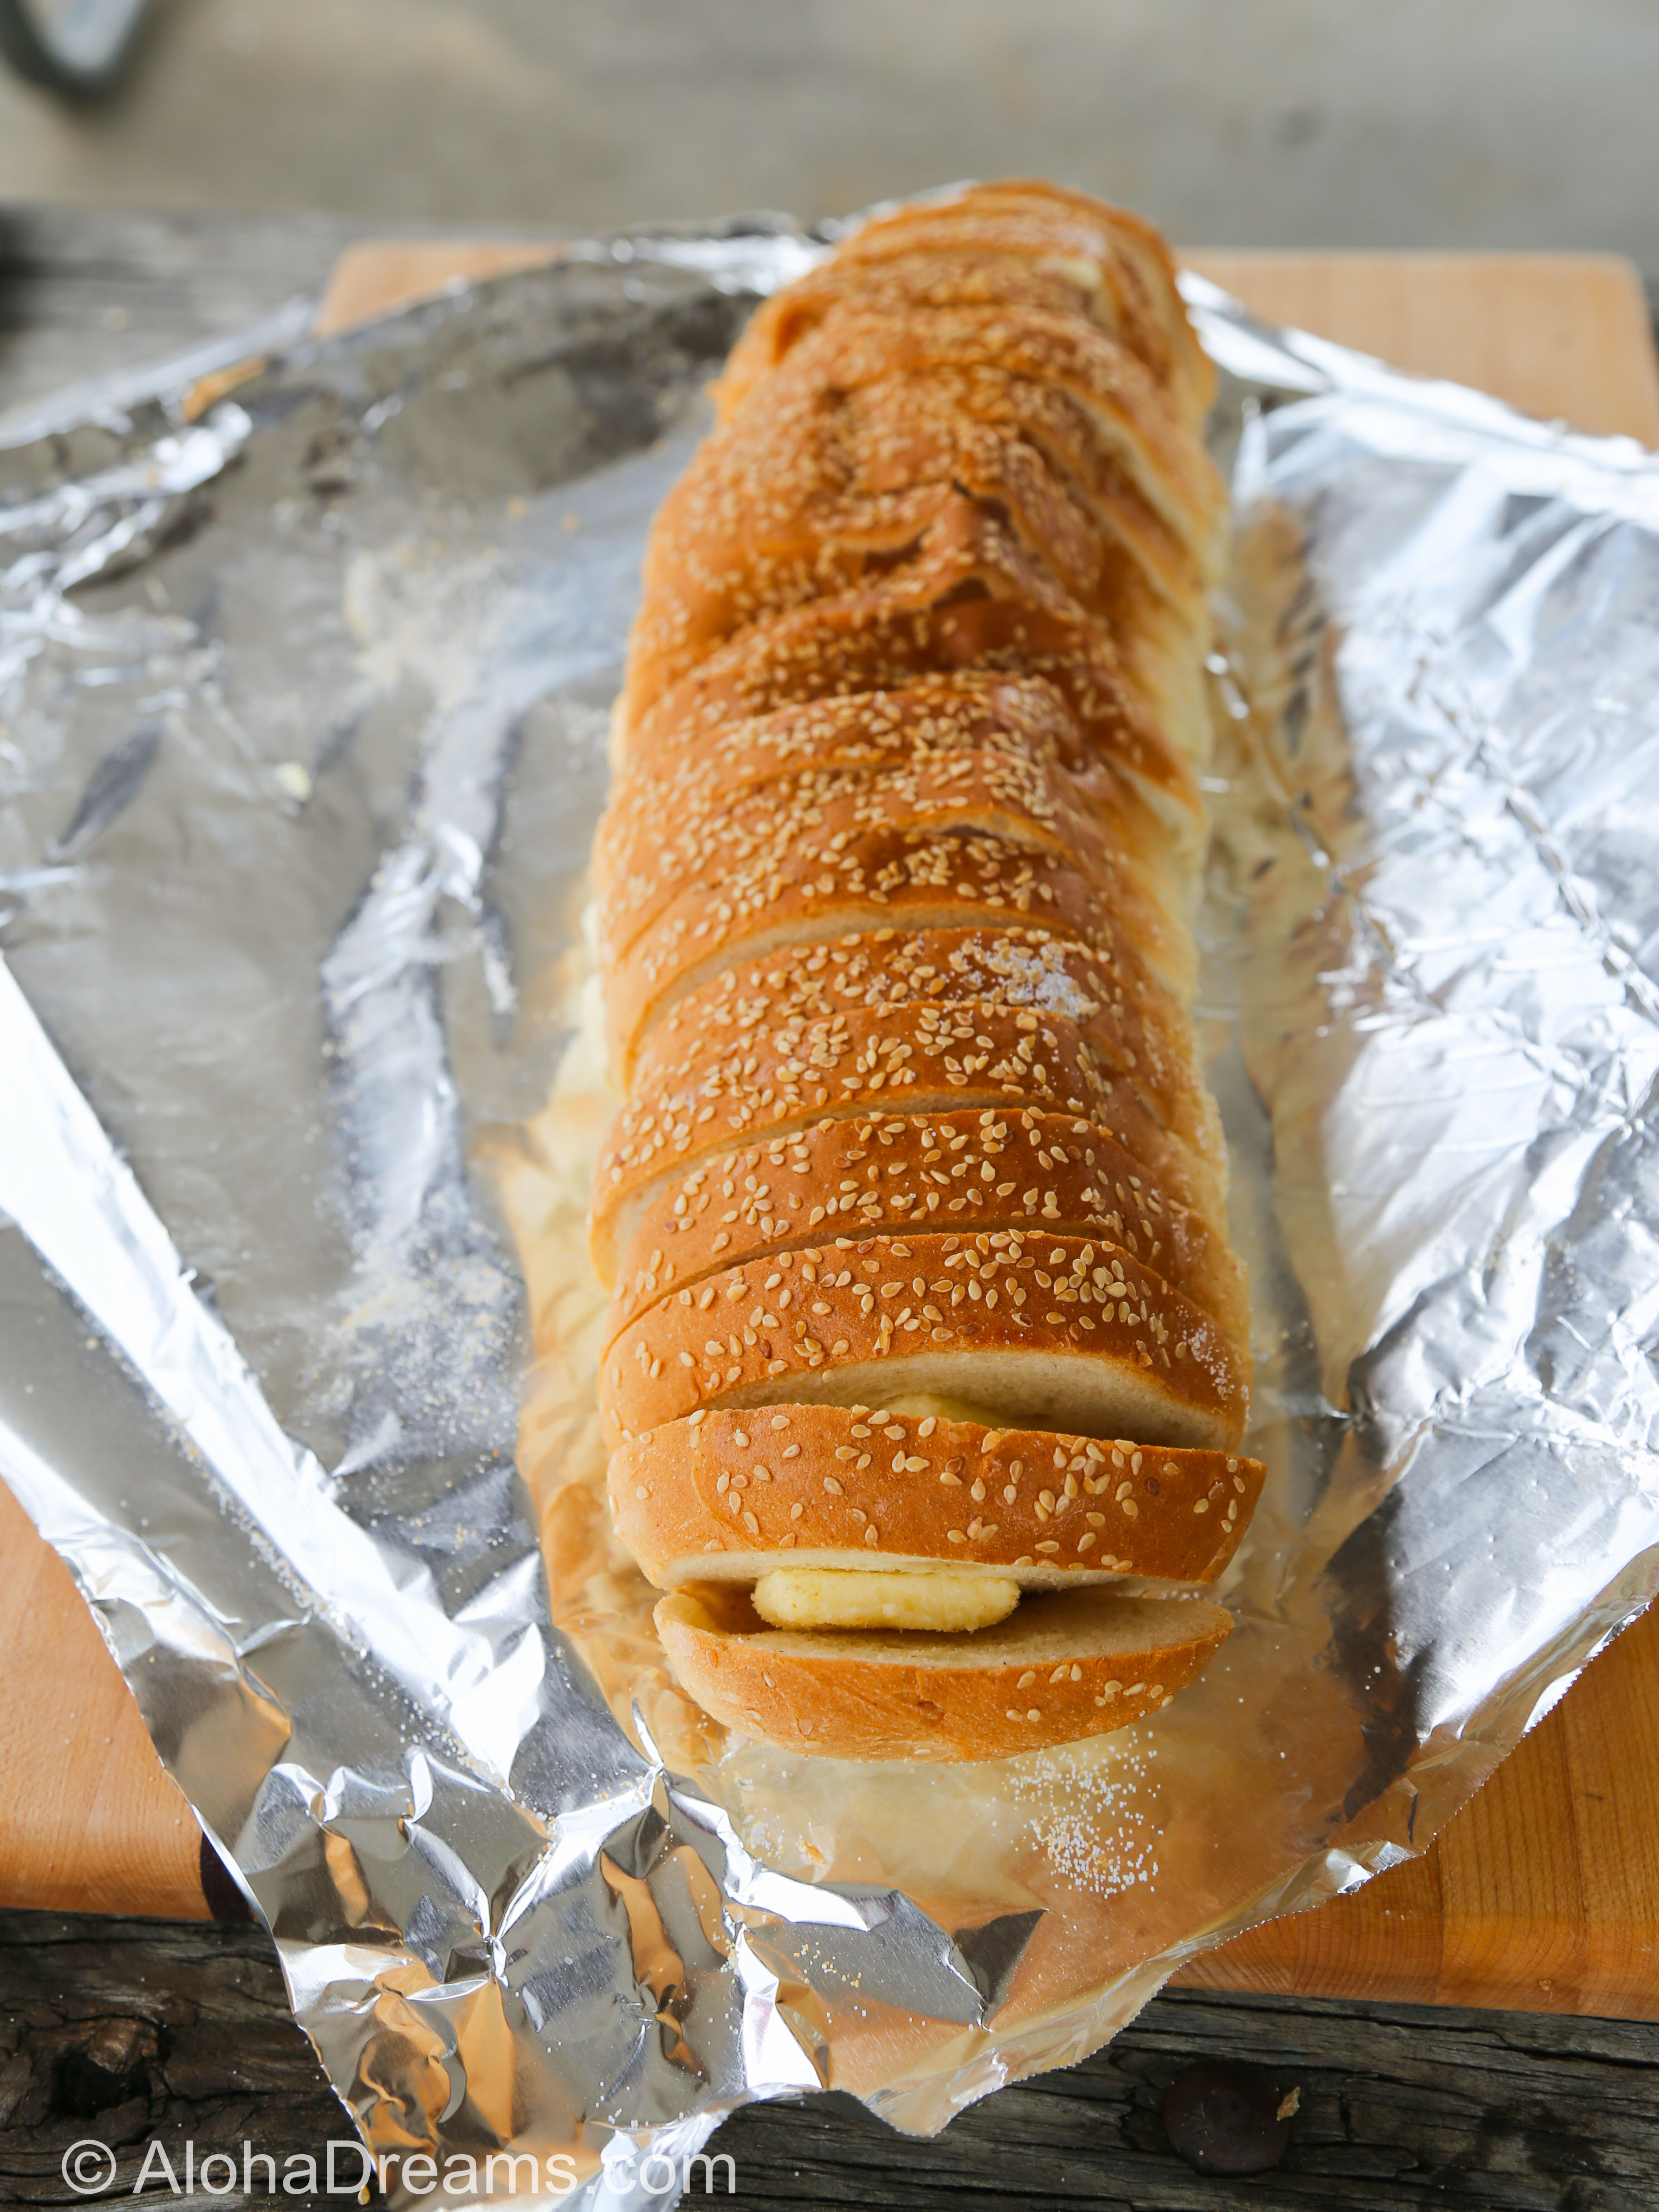
What (and How Much) Toppings do I need for a Potato Bar?
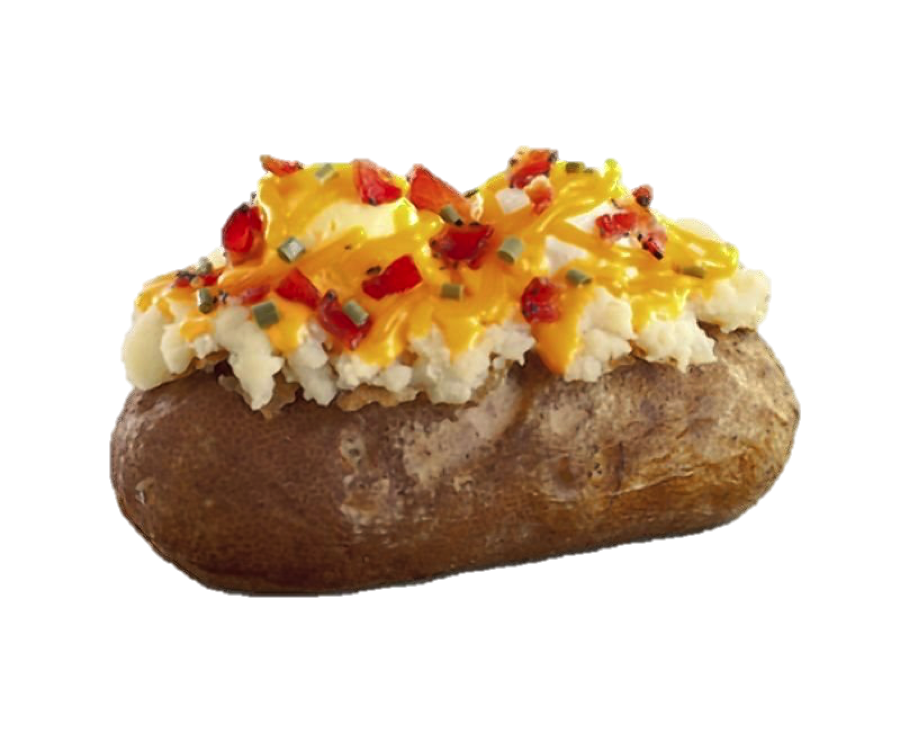
My Basic Potato Bar for Activities or Events
Plan to bring a very large metal bowl or several large roasting pans to put the potatoes in on the serving line. Also, round up the serving spoons, bowls, tongs, etc. you’ll need for the items you select below. If you’re serving the Cheese Sauce or Chili in slow cookers, you may also want to keep them plugged in until right before serving. At that point you can move them to the serving table.
- salt (NOTE: When serving groups larger than 50, I always use individual salt packets to speed up the serving line.)
- pepper (NOTE: When serving groups larger than 50, I always use individual pepper packets to speed up the serving line.)
- seasoned salt (NOTE: just set out 1 or 2 small shakers)
- butter (NOTE: When serving groups smaller than 50, I use whipped butter. When serving groups larger than 50, I always use individually wrapped butter pats to speed up the serving line. Plan on 1 pat per person and you’ll have leftovers.)
- sour cream (NOTE: To make the sour cream easier to serve and to speed up the serving line, I always thin it with 1/4 – 1/2 cup of milk per 5 pound container. Plan on an average serving of 2 tablespoons per person and you will have leftovers. A large (5 pound) tub of sour cream, thinned with 1/4 – 1/2 cup milk contains approximately 40-50 servings. )
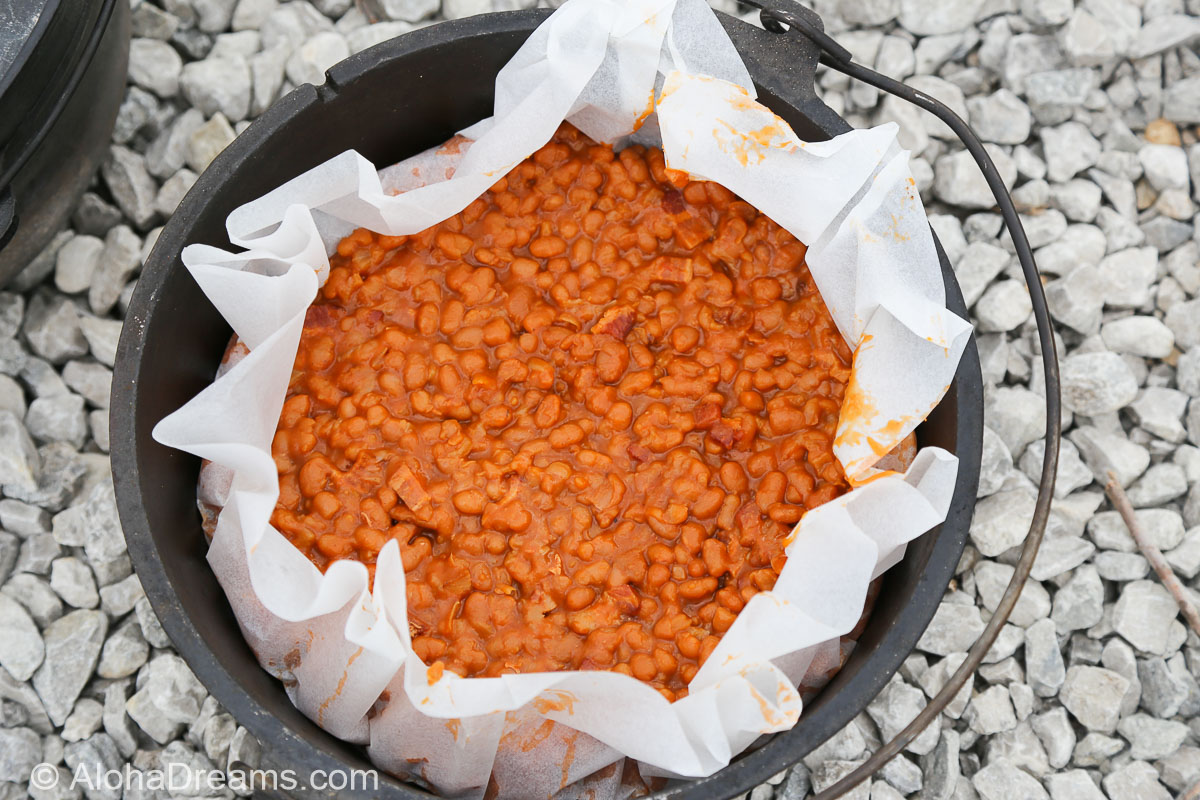
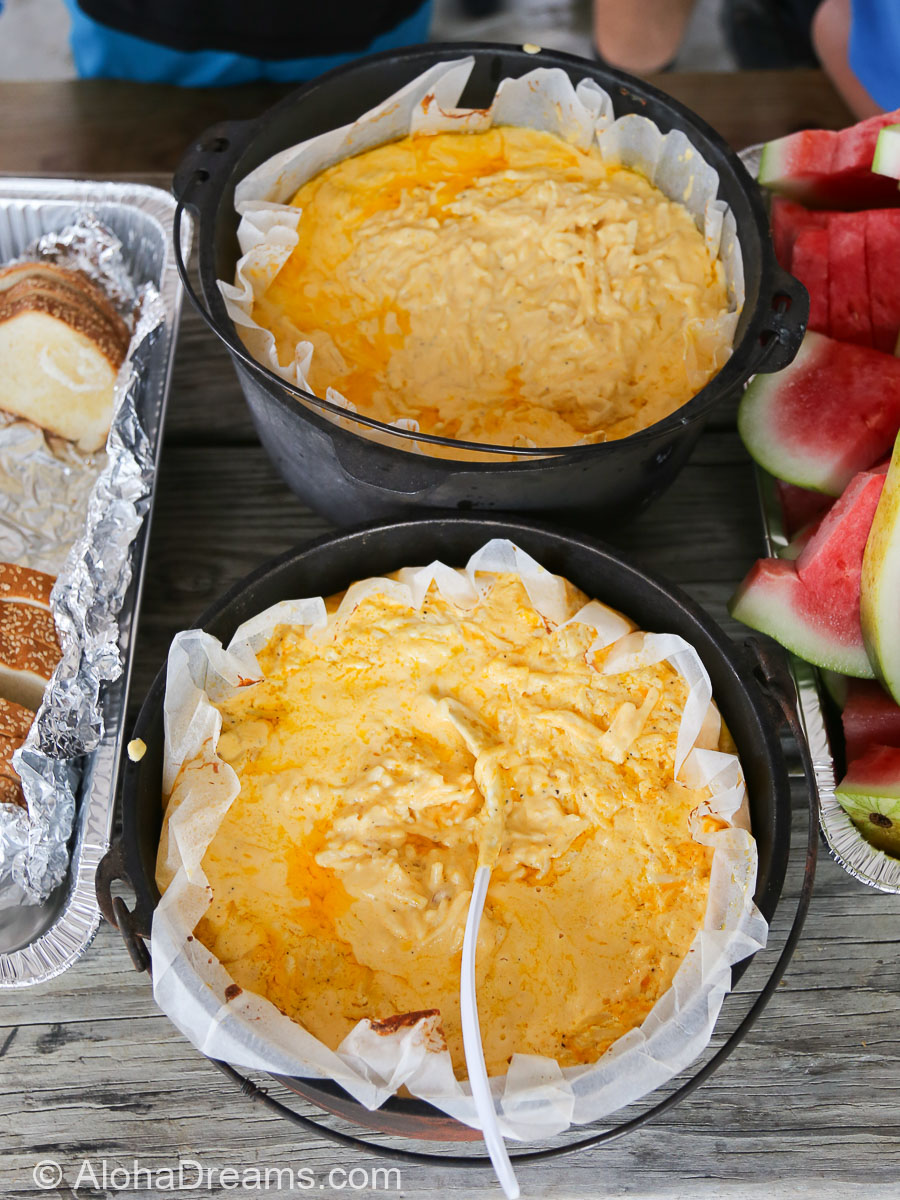
- canned cheese sauce (NOTE: A typical serving size of cheese is 3 tablespoons (2 1/4 ounces of queso), which is about 1/4 cup or 1 ladle-full. If I’m cooking for more than 50, I buy the 6 pound, a 11 ounce can of Cheese Sauce from Sam’s. You’ll want to allocate time to prep it, because even heated, the cheese sauce straight out of the can is far too thick to eat, let alone serve, effectively. You’ll need to thin the (6 pound, a 11 ounce) can of sauce down with 3 cups (24 ounces) of water. The (6 pounds, 11 ounces) can of cheese sauce plus 24 ounces of water has a total weight of 8 pounds 3 ounces – and easily serves 50 – 60 people.
- fantastic homemade broccoli and cheese sauce (see my recipe for Fantastic Broccoli and Cheese Sauce)
- chili (see my recipe for Best Ever Chili) NOTE: A large (108 ounce) can of Chili, thinned with 2 cups water, contains approximately 50 -60 servings. Plan on an average of 1/4 cup per person.
- steamed broccoli (NOTE: 2 pounds of broccoli florets (approximately 4-5 cups) serves about 16-20 people. Plan on about 3 out of 10 taking the broccoli.)
- Hidden Valley Ranch Dressing (NOTE: 1 (2 pack – 40 ounce each (80 ounces total)) Hidden Valley Ranch Dressing + 1/4 cup (2 ounces) Milk per each (40 ounce) container of dressing SERVES 100 – 120. For faster serving, mix dressing with milk then pour thinned dressing into 2-4 squeeze bottles (label these “Ranch Dressing” or pour it back into the original dressing bottles.
- salsa (NOTE: Plan on an average of 2 tablespoons per person.)
- Super Spud Sauce – See recipe below.
- chopped green onions
- bacon bits (if budget permits)
Makes about 45 ounces. About 20 servings. Assume an uptake of 1 out of 2 people
- 1 pound hamburger
- 1 teaspoon salt
- ½ teaspoon pepper
- 1 teaspoon onion powder
- 1 teaspoon garlic powder
- 1 22.6 ounce large can Cream of Mushroom Soup
- 1 8 ounce brick of cream cheese
- 1/2 cup milk
-
In a medium skillet add hamburger. Cook over medium heat, breaking up into small pieces. Season with 1 teaspoon salt, ½ teaspoon pepper, 1 teaspoon onion powder, and 1 teaspoon garlic powder. When brown drain fat.
-
Add Cream of Mushroom soup and cream cheese to browned hamburger. Cook over med heat working the cream cheese into the hamburger mixture until cream cheese is melted.
-
Add milk and mix well.
-
Reduce heat and simmer over med-low heat for 10 minutes, stirring often.
-
Serve over baked potatoes (great over rice, as well).
Additional Options for a more Fancy Potato Bar
Cheese:
- shredded cheddar cheese
- shredded Monterey jack
- crumbled blue cheese or feta cheese
- grated Parmesan
Meats:
- seasoned taco meat
- pulled pork (see my recipe for Pulled Pork for a Large Group or COMING SOON: Carnitas)
- shredded beef
- chopped ham
- chopped salami or pepperoni
Vegetables:
- steamed broccoli in a cheese sauce
- grilled corn
- beans (canned black beans or chili beans)
- chopped fresh tomatoes
- chopped sun-dried tomatoes
- sauteed spinach
- sauteed mushrooms
- grilled onions
- roasted red peppers
- sliced jalapenos (fresh or from a jar)
- thawed frozen peas (no need to cook them)
Sauces & dressings:
- barbecue sauce
- gravy
- Alfredo sauce
- marinara sauce – or other red Italian sauce (COMING SOON: see my recipe for Marinara Sauce)
Fresh herbs and seasonings:
- chopped fresh basil, cilantro, oregano, or dill
- crushed red pepper
- seasoned salt
- chopped chives
Explore Aloha Dreams

PARTY
Would you like to throw a Luau, but not sure where to start? Want to know how to build a tiki bar and roast a pig? Here's everything you need to have a luau. How about a Christmas Feast or even a fabulous dinner for your neighborhood supper club? You've come to the right place. Let's party!

AHONUI
Ever wished you could build your dream home? Like amazing house design and home building ideas? Me too! Join me as I design and build a home on the Big Island of Hawaii. Follow along while I design each room. Enjoy a front row seat for the entire amazing construction process. Let's play!

EXPLORE
If you're planning a vacation to Hawaii, I've got you covered on the very best places to go! From many amazing restaurants to incredible adventures in the surf and on land, this is your go-to source for unique and exciting things to do on the Big Island of Hawaii. Or just take a Virtual Vacation!! Let's go!

SAY YES!
If you've been asked to cook for a large group activity, be it a Girl's Camp or a Graduation Party, say Yes! I'm here to help. From Menus to Game Plans to Recipes, I'll help you keep on schedule and turn out amazingly delicious food if you're cooking for a crowd! My recipes are tested and trusted. Let's cook!
Explore Aloha Dreams

EXPLORE
If you're planning a vacation to Hawaii, I've got you covered on the very best places to go! From many amazing restaurants to incredible adventures in the surf and on land, this is your go-to source for unique and exciting things to do on the Big Island of Hawaii. Or just take a Virtual Vacation!! Let's go!
SAY YES!
If you've been asked to cook for a large group activity, be it a Girl's Camp or a Graduation Party, say Yes! I'm here to help. From Menus to Game Plans to Recipes, I'll help you keep on schedule and turn out amazingly delicious food if you're cooking for a crowd! My recipes are tested and trusted. Let's cook!
AHONUI
Ever wished you could build your dream home? Like amazing house design and home building ideas? Me too! Join me as I design and build a home on the Big Island of Hawaii. Follow along while I design each room. Enjoy a front row seat for the entire amazing construction process. Let's play!
PARTY
Would you like to throw a Luau, but not sure where to start? Want to know how to build a tiki bar and roast a pig? Here's everything you need to have a luau. How about a Christmas Feast or even a fabulous dinner for your neighborhood supper club? You've come to the right place. Let's party!